[Raspberry Pi] Install Raspberry Pi OS with RPI Imager and Headless Setup
Once I entered to the Raspberry Pi homepage to find Raspberry Pi OS, there was a new tool called RPI Imager.
So I used the RPI Imager and summarized about Installing the OS with it and setup Headless and SSH connection.
Materials
I’m using Windows 10 64bit Environment.
- Raspberry Pi 3 or 4 (I used 3)
- For Zero model, WiFi setup required
- Micro SD card (at least 16GB)
- USB micro sd card reader
- Ethernet cable
Install Raspberry Pi OS with RPI Imager
In the past, I wrote the OS image(.iso) file directly to the micro sd card using Win32DiskImager tool.
I felt while using the RPI Imager this time is that it is composed of a GUI screen and is intuitive and easy to use. And the screen composition is simple but pretty. ![]()
The convenient part is that there is no need to separately find and download the OS image file, and simply click the button after selecting the desired OS.
However, the writing time took a little longer than the existing method based on the same environment. Previously, it took about 10 minutes, but it took more than 25 minutes with the Imager.
Here is a brief summary of the installation process.
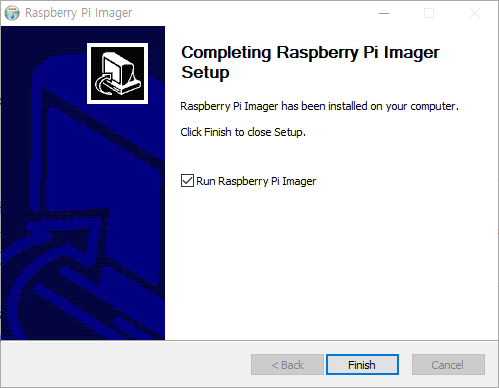
Install RPI Imager

After installation is complete, below is the initial screen of execution.
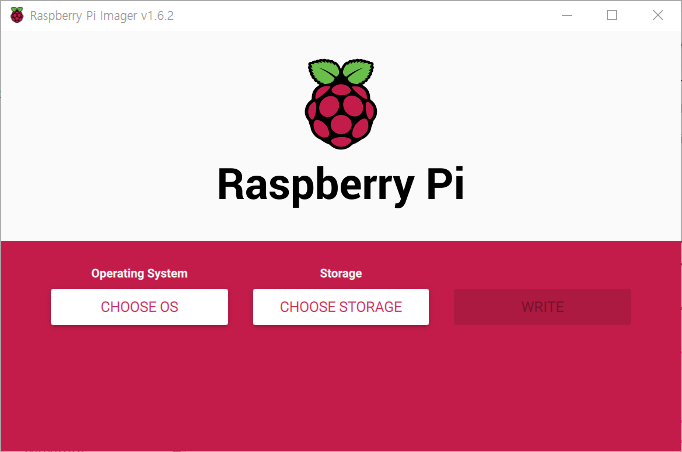
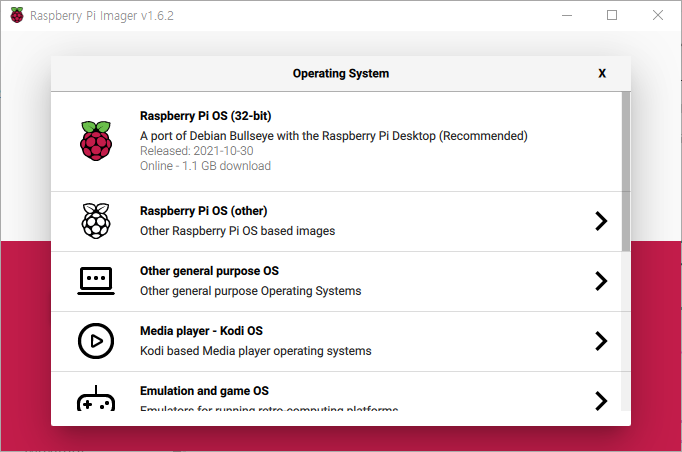
Choose OS and Storage
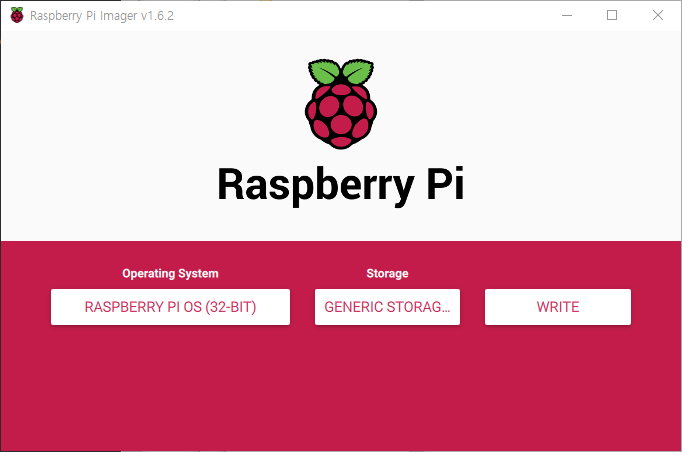
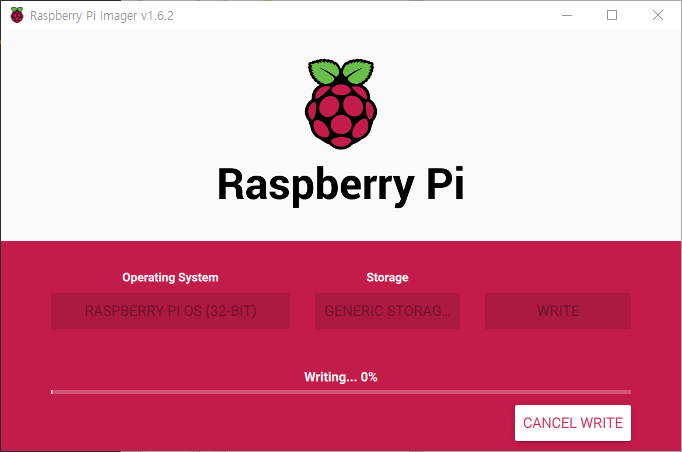
Select the OS type to be installed and the target storage to be installed. I selected the most used Raspberry Pi OS (32-bit), followed by storage.
If you have multiple repositories, be careful with your selection.

Write
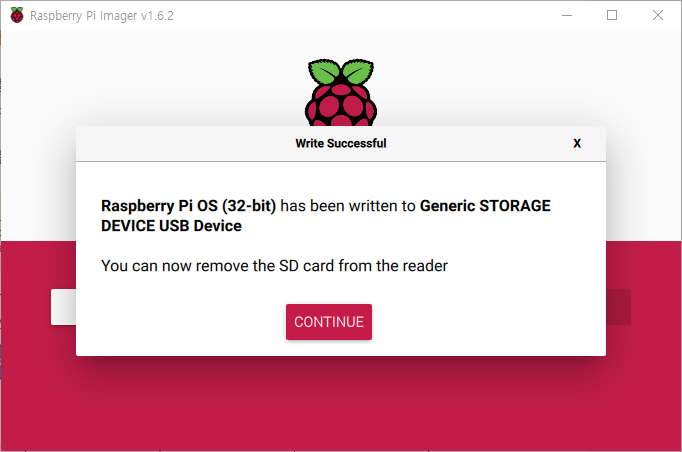
After selecting OS and storage, click the WRITE button to proceed with image installation.
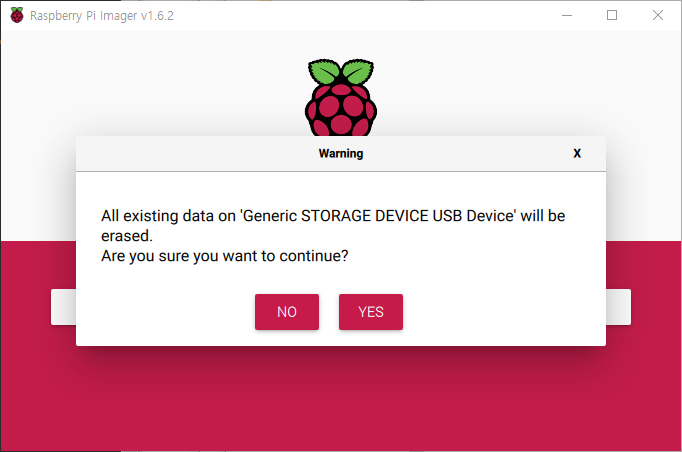
A pop-up message will appear when the process is complete, and you will see a message stating that it is now OK to disconnect.
Do not disconnect the connection immediately, but proceed with the following Headless setup.
Headless Settings
Before disconnecting the USB reader, we will configure it to connect to the RPI without a display connection. If you have already disconnected, you can reconnect.
- Enable SSH
- Network settings (Ethernet)
To use WiFi, you need to create one more file. (RPI zero W model)
WiFi Configuration file reference: Raspberry Pi Headless setup - wpa-supplicant.conf
Enable SSH
Based on the Windows environment, if you look at the PC drive list in the state that OS write is completed, the boot drive is created.
After moving the path to the boot drive, an empty file named ssh is created.
Create an empty file with filename ssh
- When using Windows Git Bash
If Git Bash is installed and the right-click option is set, you can open a Git bash window directly from the boot drive.
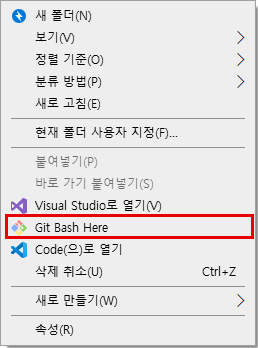
Enter the command below to create a file.
touch ssh
- When using the command prompt (cmd)
After moving to the boot drive path, click the path bar at the top (or alt+d) and type cmd to open a command prompt terminal at that path.
Or you can also open the Run window with ![Windows Key][winlogo] + r, type cmd, and then enter the drive letter path to navigate to it.
Enter as follows.
type NUL > ssh
The file should be created as below.

Network settings (Ethernet)
Since it has been used as an Ethernet environment before, the same network was used this time as well.
If you are using Ethernet, you do not need to set any special settings.
If you know your network band and want to use a static IP for RPI, you can edit the cmdlines.txt file.
Open cmdlines.txt file and add ip=MY_LOCAL_IP to the end of the line.
Connect via ssh
After installing the micro sd card that has been set up on the Raspberry Pi, connect the power.
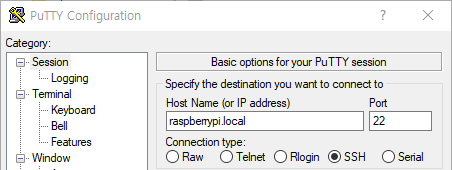
To connect with SSH, I used PuTTY, a freeware tool.
Run PuTTY and type the following.
- Choose SSH
- hostname: raspberrypi.local
When connecting, the first fingerprint confirmation window appears, just select Yes (Y).

Enter ID and Password. The initial account is as follows.
- ID: pi
- PW: raspberry
If connected successfully, you will see the following screen.
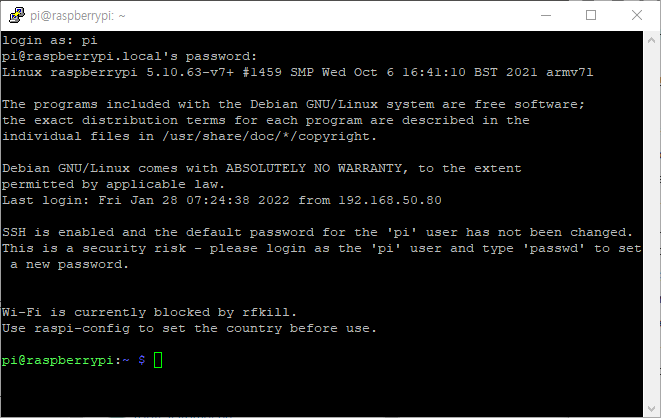
Up to this point, Raspberry Pi OS installation, Headless setup, and SSH access have been completed.