[Raspberry Pi zero W] Add ethernet interface using WIZ850io (linux kernel v5.x)
Overview
WiFi is convenient, but sometimes it’s slow or disconnects. Some projects require a more reliable connection than convenient.
In this case, it may be more advantageous to use a wired connection, that is, an Ethernet interface.
So, I’m going to explain how to add an Ethernet interface to Raspberry Pi Zero W.
Components
Hardware
- Raspberry Pi zero W
- WIZ850io (W5500 ethernet module)
- Jumper wires
The WIZ850io is a module from WIZnet, which is based on the W5500 Ethernet chip and includes an RJ45 connector.
The W5500 is an Ethernet controller chip with hardwired TCP/IP and supports SPI communication. It helps to easily add internet connection to embedded system.
Details of the WIZ850io module can be found on the link below.
- WIZwiki - WIZ850io
- Support Auto Negotiation (Full and half duplex, 10 and 100-based)
- Support high speed SPI interface.
- Support power down mode and Wake-on-LAN function
For more details, visit below link.
Software
To store and manage sessions, I used PuTTY, a representative free terminal program. You can use the terminal program you are comfortable with.
- PuTTY (optional)
- Raspberry Pi OS
- I used 2021-10-30 released version (Linux kernel 5.10.63)
Hardware connection
Below is the pin connection information of RPI zero and WIZ850io.
Each pinmap can be found at the following link. For RPI zero, the direction may be confusing, from the side with the micro sd card slot to the one.
| RPI zero W | WIZ850io |
|---|---|
| 6 (GND) | GND |
| 1 (3.3V) | 3.3V |
| 23 (SPI0_SCLK) | SCLK |
| 19 (SPI0_MOSI) | MOSI |
| 21 (SPI0_MISO) | MISO |
| 18 (BCM24) | RSTn |
| 22 (BCM25) | INTn |
| 24 (SPI0_CE0) | SCNn |
If all the pins are connected, it will look like the picture below.

Install Raspberry Pi OS
If you didn’t install Raspberry Pi OS yet, please refer below link.
Enable Linux driver for WIZ850io
Device tree overlay setting
To use WIZ850io(W5500), we need to add device tree overlay setting.
Since the binary file is already included in the OS, we can add the w5500 configuration to /boot/config.txt .
The name used when setting the device tree overlay follows the name of the .dtbo file.
The file name is w5500.dtbo that we will use.

To modify files in the boot directory, root authority is required, so use the sudo command.
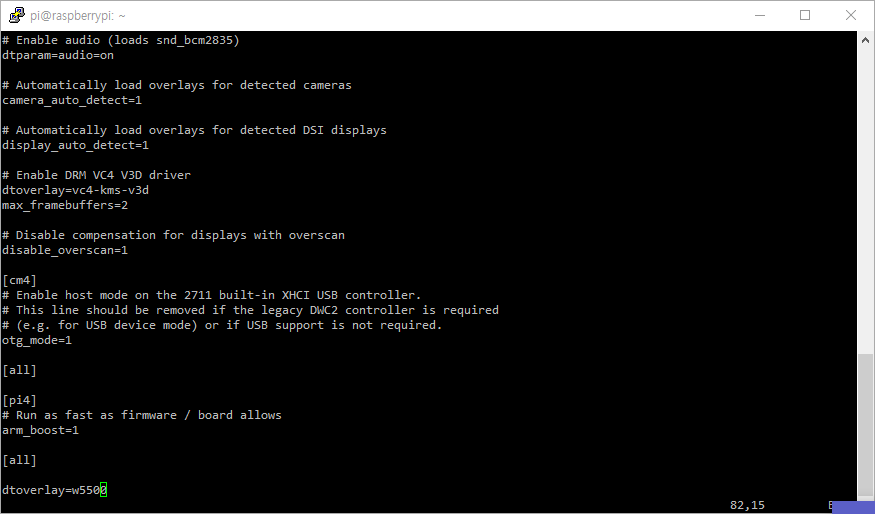
sudo vi /boot/config.txt
Add below line.
How to add text with vim
- To go to end of file: enter shift + g
- To insert text: enter i
- Add text:
dtoverlay=w5500
- Add text:
- To quit edit mode: Esc
- To save and quit file: :wq
After setting, reboot to apply Overlay setting.
$ sudo reboot
Since the ssh connection is disconnected after rebooting, run putty again to connect.
Activate Device driver module
Activate the W5500 ethernet device driver module using the modprobe command.
The W5500 device driver can be referred to in the following path.
sudo modprobe w5100
sudo modprobe w5100_spi
Use the following command to check whether the driver module has been successfully loaded.
lsmod | grep w5100

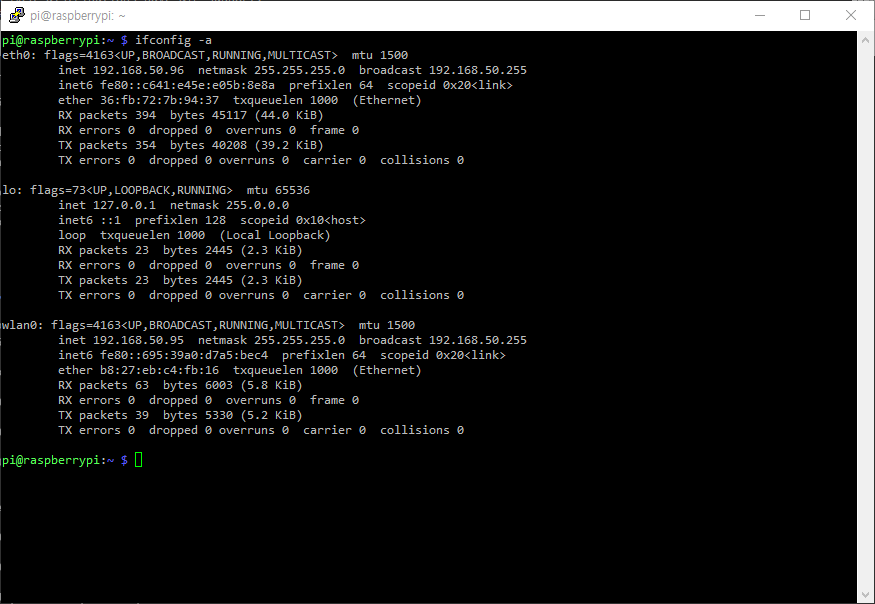
Now, we can check the network interface with the ifconfig -a command.
We can see that the eth0 interface has been created. If a DHCP server is set up on the router, an IP can be assigned automatically.

Static IP setting
Optionally, you can configure Ethernet to be used as a static IP. Set the IP according to the internal network IP band of the environment in use.
Since my AP uses the 192.168.50.X band, I set it up like below.
Open a network configuration file with VIM.
sudo vi /etc/dhcpcd.conf
interface eth0
static ip_address=192.168.50.96/24
static routers=192.168.50.1
static domain_name_servers=168.126.63.1 168.126.63.2
After save the file(:wq), reboot to apply configuration.
sudo reboot

Now, we can connect to Raspberry Pi zero W with ethernet interface using static IP!