How to use the M5Stack Sensor Unit with W5100S-EVB-Pico using Arduino IDE
Overview
I will summarize how to connect M5Stack Sensor Unit to W5100S-EVB-Pico and operate it using Arduino IDE.
There are M5Stack Unit sensors that can be used in the office, so I decided to use them by connecting them to the W5100S-EVB-Pico.
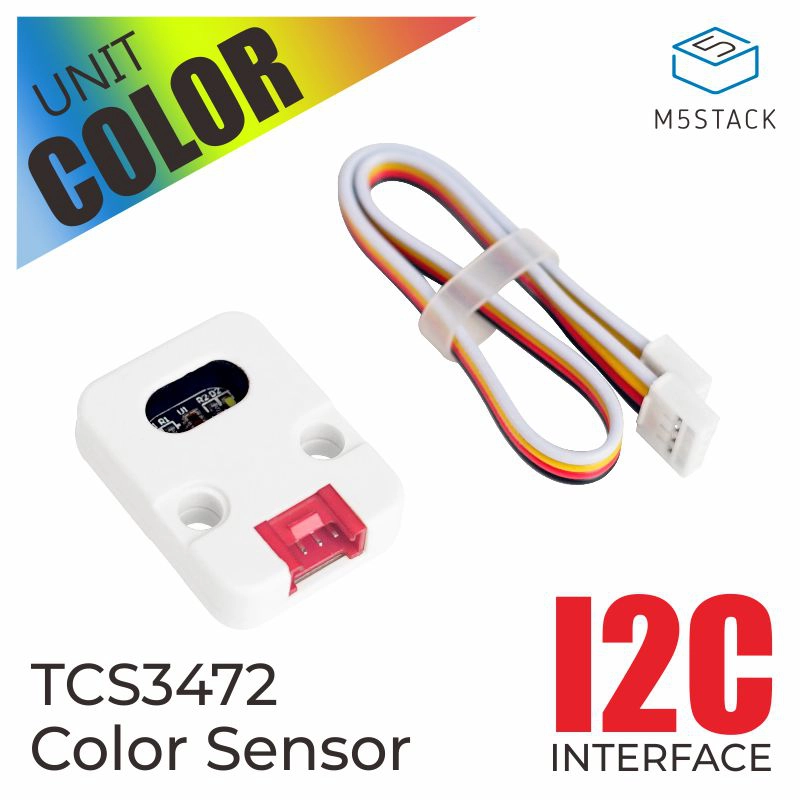
M5Stack supports many types of sensors in the form of units, and I used the color sensor (TCS34725).
Hardware
I used W5100S-EVB-Pico as the main device, and used a color sensor unit and a cable to connect them.
- W5100S-EVB-Pico (H/W v1.0)
- M5Stack Color sensor unit
- Grove to Jumper cable
- Jumper cables
Pin connection
Pin information can be referred to in the hardware information link above.
The Color sensor unit operates with an I2C interface, and is in the form of a Grove interface as shown below.
(Image source: https://docs.m5stack.com/en/unit/color)
I was concerned about how to connect sensor to the W5100S-EVB-Pico board, but luckily I found a Grove to Jumper cable and was able to connect it. (Male-Female did not fit, so I used 4 additional jumper cables.)
When I searched with the keyword Grove to Jumper, it was sold in various forms. If you need more, you can purchase it and use it.
I wired some pins as follows.
| [W5100S-EVB-Pico] | [Color sensor(TCS34725)] |
|---|---|
| 3V3 (Pin 36) | 5V |
| GND (Pin 8) | GND |
| GPIO5/SCL (Pin 7) | SCL |
| GPIO4/SDA (Pin 6) | SDA |
Below is a picture of the completed connection.

Hardware preparation was completed like this.
Using the Arduino IDE
Board Manager Settings
I refer to the following article to use W5100S-EVB-Pico in Arduino IDE.
I did not proceed with the Ethernet connection part because only a simple sensor test would be conducted.
The process is summarized as follows.
After launching the Arduino IDE, add the URL below to Additional Board Manager URLs.
- File - Preferences
https://github.com/WIZnet-ArduinoEthernet/arduino-pico/releases/download/global/package_rp2040-ethernet_index.json
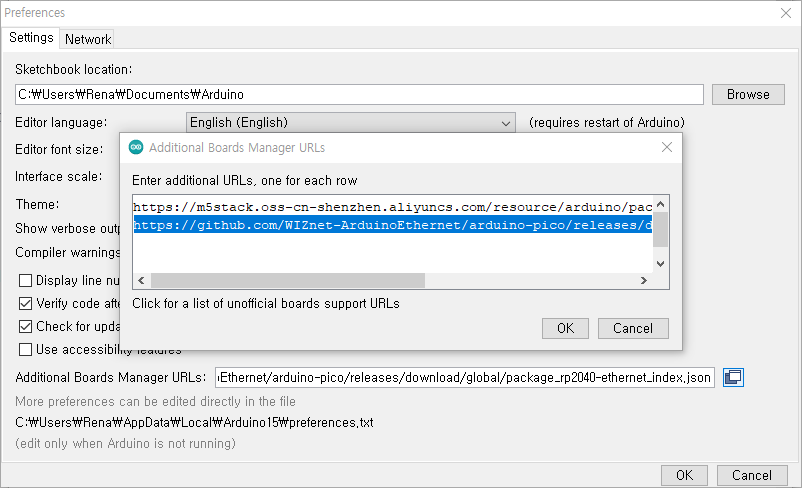
Click the OK button to save.
After entering the Tools > Boards > Boards Manager menu, search “pico” keyword and scroll down Raspberry Pi Pico/RP2040 Ethernet to find the package.
As of May 2022, the latest version is 1.0.1.
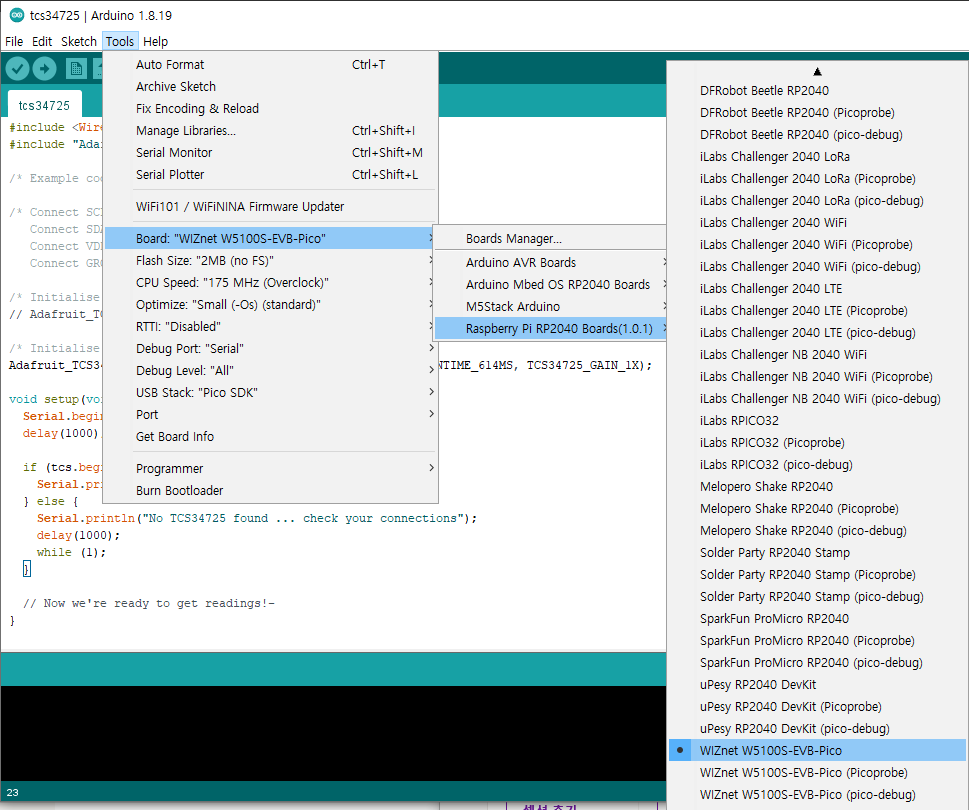
After installation, proceed to WIZnet W5100S-EVB-Picoboard selection.
- Tools > Boards > Raspberry Pi RP2040 Boards > Select WIZnet W5100S-EVB-Pico
TCS34725
Install sensor library
Adafruit supports TCS34725’s Arduino library.
In the Arduino IDE menu, select Tools > Manage Libraries(or shortcut Ctrl+Shift+i) and filter by keyword tcs34725.
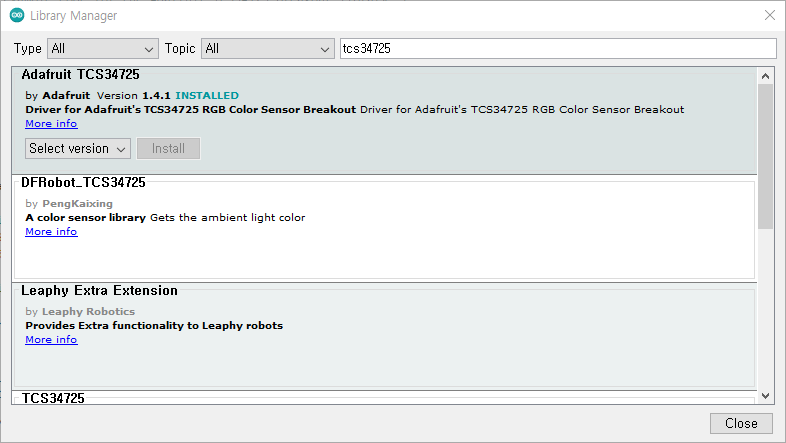
Select Adafruit TCS34725 and install.
Sample code
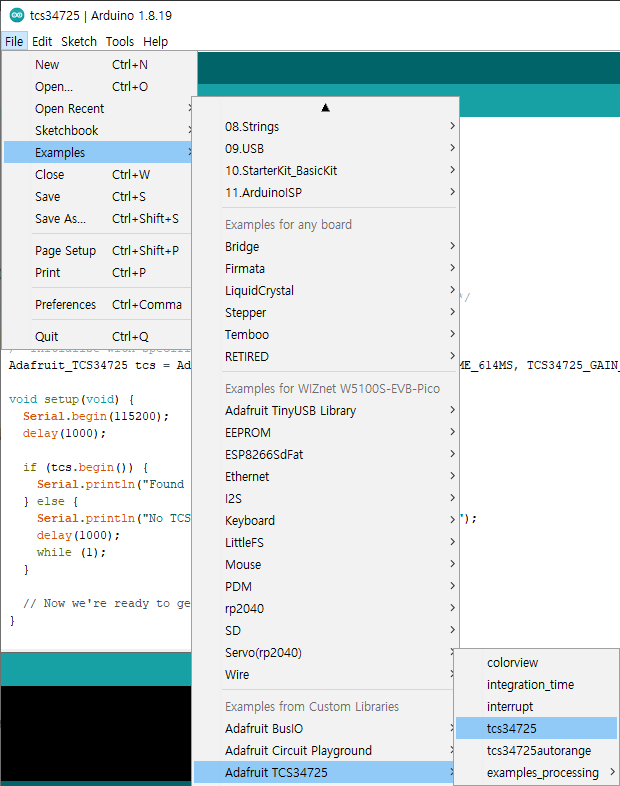
Among the sample codes of the sensor, I used the tcs34725 sample.
- Code link: https://github.com/adafruit/Adafruit_TCS34725/tree/master/examples/tcs34725
You can directly call the sample code from the installed library through the menu below.
- File > Examples > Adafruit TCS34725 > Select tcs34725
Upload Firmware
When uploading for the first time to Raspberry Pico board including W5100S-EVB-Pico using Arduino IDE, it is necessary to change to Boot mode.
After uploading once, it is possible to upload immediately through the recognized Com Port without changing the mode.
From W5100S-EVB-Pico H/W v1.1, you can change the mode by pressing two buttons (RUN, BOOTSEL) without re-applying power.
The history and usage of this can be referred to in the article below.
When the mode is changed, a drive named RPI-RP2 appears on the PC, and firmware can be loaded there.

Now click the Upload button to upload the firmware. After compile, the upload proceeds.
When the upload is complete, you can see the following log.
If you do not see the detail log, check the compile and upload items in “File” > “Preferences” > “Show verbose output during:”.

Monitoring
Check that the sensor data is uploaded through the serial monitor menu (shortcut key: Ctrl + Shift + m) of the Arduino IDE.
If you move the sensor unit, you can see that the color measurement value changes.

So far, I have checked the sensor operation using W5100S-EVB-Pico and Arduino IDE.
Next, plan to test the operation of other types of sensors and expand them by adding functions such as transmission data to the cloud.